
Autopay is a great feature that can be turned on for your recurring invoices with Elivated. It’s a great way to ensure not only for your bills to be paid on time but also for saving your time in adding your payment information every time you pay the invoice. In this article, we’ll walk you through how you can turn on the autopay feature directly from your invoice.
Turn On Auto Pay
We use Quickbooks to send invoices for our clients because it allows you to pay your invoices online either using a card or ACH. You will receive your invoice via email which includes your payment link.
Please note that in order for you to use the Auto Pay feature, you will need to create an Intuit account. Don’t worry, you don’t need to pay anything to create one!
1. To create an Intuit account, simply look for the invoice email you received from us.
2. Then, click the payment link.
3. In the invoice page, look for the message that says “Save a payment method for faster future payments. Sign in or Create an account”
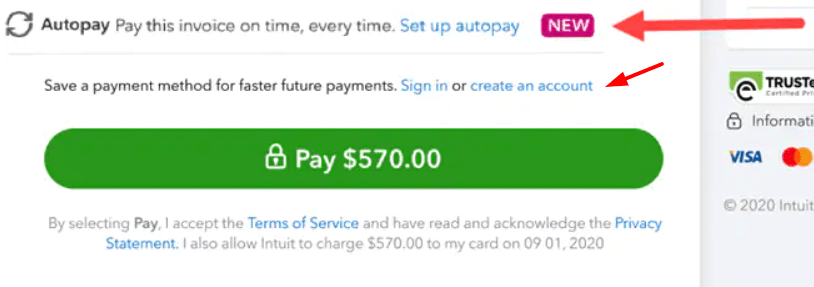
4. Click Create an account. Follow the instructions from the prompt.
5. Once you are logged in, go back to the invoice page.
6. Click the Setup Auto Pay link
7. Make sure that the AutoPay checkbox with the frequency and date is checked.

8. Once everything looks good, simply tap the Autopay button
You’re all set! You’ll receive an invoice as normal but you will be automatically charged on the frequency date the recurring invoice is set.
If you encounter any problem, please contact us or pop in to our chat support between 9 AM to 3 PM Eastern Time to get started!